When a ship's main page is first created, the Naval Covers section already contains one active link with a default name of "Covers Page 1". You will need to do two things before you can start adding covers for the ship:
Update the page link to give it a proper page name and date range
1. Updating the "Covers Page 1" page link on a ship's main page
First you need to display the Test Ship Index Page. Right click on the link and open it in a new window or tab.
Click on the link for the ship you are working on in order to display its main page. In the tutorial, we are using SHIP2 but you should click on the link for ship you are working on.
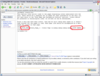
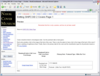
On the ship's main page, click the "[edit]" link at the far right of the line with "Naval Covers". This will display only that section in edit mode.
<< Image showing the link to edit just the "Naval Covers" section of the ship's main page.
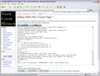
<< Image showing the Naval Covers section in edit mode.
and look for the PAGE_NAME and (DATE RANGE) portions.
<< Image showing the important portions of the line
Change the PAGE_NAME portion of PAGE_NAME_Covers_Page_1 to the name and designation of the ship. For the tutorial, the ship is SHIP2 DD-2 so we would change PAGE_NAME to SHIP2_DD_2.
If you will be adding covers to the covers page, then change the (DATE RANGE) portion at the end of the line to indicate the start and end years for the covers. For example, if you will be adding three covers and they are from 1932, 1935, and 1940, then the date range would be (1932 - 1940). If all the covers are from one year, say 1935, then just put the one year: (1935).
Some ships may have many covers for a single year - more than can reasonably fit on one covers page (30 or so covers per page is about the maximum you should have). In this case, use full dates in the form yyyy-mm-dd instead of just the year. For example, (1935-02-01 to 1935-05-30)
Do not change anything else in the line (ie, leave the label at "Covers Page 1"). You should end up with something that looks like the this:
<< Image showing the ship's main page after the changes are saved.
2. Creating the page that the "Covers Page 1" page link points to
For this part of the tutorial, you will need to copy and paste a template. To find the template, first go to the How To Edit Pages page. You will find a link to this page in the left hand navigation bar. Right-click on the link and open the page in a new window or tab so that you can access it without losing your place in the Tutorial.
<< Image showing the link to the "How To Edit Pages" page
On the "How To Edit Pages" page, scroll down until you see the section called "Templates to use when creating new pages in the Museum". Within this section is a link called Ship Cover Page. Click this link to display the "Ship Cover Page Template" page.
<< Image showing the link to the "Ship Cover Page Template" page
<< Image showing the "Ship Cover Page Template" page
We will not do anything with this page just yet; we just need to have it ready.
Now you need to go back to your ship's main page.
If you do not already have your ship's main page in a browser window, first display the Test Ship Index Page (right click on the link at the left and open it in a new window or tab). Then click on the name of the ship you are working on and the main page for your ship will appear. For the Tutorial, we used SHIP2.
Scroll down and click on the "Covers Page 1" link under the "Naval Covers" section.
<< Image showing the link for the "Covers Page 1" page.
The page for SHIP2 DD 2 Covers Page 1 will appear - but in Edit mode.
You will see a big empty text box in the middle of the page. This is where the page code will go.
<< Image showing the "SHIP2 DD 2 Covers Page 1" page in Edit mode
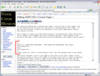
Switch to the browser window that contains the Ship Cover Page Template page. You will see a large section in the middle with a light gray background and a border of small blue dashes. You need to copy all the text inside this entire section using your normal Copy/Paste technique (ie, highlight all the text with the mouse and then either hit the Control-C key, or right-click in the highlighted text and select Copy in the pop-up menu, or go to the menu bar and select Edit and then Copy).
Make sure you get them all.
Dont worry about what all the lines mean. You will only have to deal with a small portion of it. The rest will be left as-is.
<< Image showing the template lines highlighted
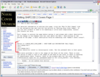
Back on the "SHIP2 DD 2 Covers Page 1" page, click inside the text box in the middle of the page and then Paste the lines you copied from the template (ie, either hit the Control-V key, or right-click in the highlighted text and select Paste in the pop-up menu, or go to the menu bar and select Edit and then Paste).
<< Image showing the text pasted into the text box of the "SHIP2 DD 2 Covers Page 1" page
There is only one change you need to make at this time - adding a link back to the ship's main page. In the text box, look for the following section (it should be close to the top):
<!--
Return to [[MAIN_SHIP_PAGE_NAME | <SHIP NAME and DESIGNATION> Main Page]]
<br/> <br/>
<hr/>
<br/> <br/>
-->
Covers should be listed in chronological order. Use the postmark date or best guess.
<< Image showing the location of the code that needs to be modified.
You need to remove the comment tags at the beginning and end and then change the page link to point back to the ship's main page. We'll walk you through each step:
Remove the comment tags at the beginning and end of the section of code by deleting those lines. The section of code should end up looking like this:
Return to [[MAIN_SHIP_PAGE_NAME | <SHIP NAME and DESIGNATION> Main Page]]
<br/> <br/>
<hr/>
<br/> <br/>
Covers should be listed in chronological order. Use the postmark date or best guess.
<< Image showing the code with the comment tags removed.
Now we edit the page link that will point back to the ship's main page. A default page link is already provided in the first line of code but we need to change it. Recall that the page link for a Museum page has two parts - a link and a label - separated by a vertical bar. Change the link portion (MAIN_SHIP_PAGE_NAME) to the name of your ship's main page. Then change part of the label portion (<SHIP NAME and DESIGNATION>) to the name, designation, and hull number for your ship.
For the tutorial, we are working with SHIP2 DD-2 so our page link will end up looking like the following:
Return to [[SHIP2_DD_2 | SHIP2 DD-2 Main Page]]
<< Image showing the code with the page link updated.
The section of code ultimately end up looking like the following:
Return to [[SHIP2_DD_2 | SHIP2 DD-2 Main Page]]
<br/> <br/>
<hr/>
<br/> <br/>
Covers should be listed in chronological order. Use the postmark date or best guess.
Now go to the very bottom of the page and find the "Save page" and "Show preview" buttons. Click the "Show preview" button to see what the page looks like in Preview mode.
<< Image showing the "SHIP2 DD 2 Covers Page 1" page in Preview mode
If everything looks reasonable, go ahead and click the "Save page" button.